Welcome to this Defender Solution demo video. In this video, we'll be walking through a fairly standard demo of Defender.
Here, as I'm logged in as an administrator, I have four options available, to administer Defender, to generate Defender reports, to register hardware token, or to request a software token. Depending on a user's role, they may be presented with one or several of these options.
First, we'll take a look at administering Defender through our web-based console. We're first presented with a dashboard view showing the overall status of our Defender environment. We can see that our log service is running, see any available warnings for Defender security servers, details about authentication requests by DSS in the last hour, as well as authentications per hour in the last 24 hours.
Here, under a configuration menu, we can set up the service account roles, log receiver service, and reporting information used by our web-based console. For service accounts, this is where we can define the account that's used to program and assign tokens for users who request them through the Defender self-service portal. Under roles, we can assign portal roles to different users in Active Directory. We can assign roles for administration, help desk users, read-only help desk users, as well as users to generate reports.
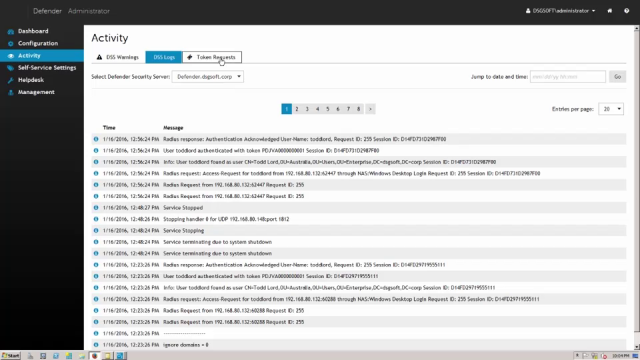
Here, under the activity menu, we can see details about any DSS warnings in our environment. We can pull up the logs from our DSSes as well as to see details about token requests. Here, under self-service settings, we can assign permissions to users in Active Directory and grant them permissions to request or register security tokens via the self-service portal. We can also assign the default location where tokens will be stored in Active Directory when a user generates their own token in the self-service portal.
Here, under software tokens, we can enforce user verification when a user is completing their own token requests in the self-service portal. A user could be acquired to provide verification via email or via an automated SMS or phone call. Under hardware tokens, we can also define a default type of hardware token that a user is going to register.
The help desk menu is available to users that are assigned the role as a help desk user. In this example, we can search for a particular user and see the details of this user directly from Active Directory. We can verify the user's full name, their DN, SAM account name, Defender ID, as well as their log on, last failed, last successful logon, and successful authentication. We can also see details about the tokens that are assigned to this particular user, their authentication routes, and any of the authentications in the past.
For each of the tokens, we can pull up details and manage the token. In this display, a help desk user can work with an end user that may be having problems with their token and can validate the token response, can enforce a new PIN, can reset their token in the event that there is any authentication issues, and assign a temporary response in the event that a user has lost or damaged their token.
Here, under the management menu, we can pull up details about an individual user that we'd like to manage as well as tokens that we'd like to manage. In this example, I will look up the tokens that are assigned to my user, and I'm also presented now with options for programming a token, assigning a token, and setting the user's Defender password. We can also see details about their authentication, their last successful authentication, and any violation counts.
Now, let's take a look at the Defender Report Scheduler. Here we can work with reports scheduling, any previously scheduled reports, and any previously generated reports. In this example, we can select a report showing Defender security server information, but we also have reports available showing audit trail, authentication requests, activity, violations, licensing information, proxied users, radius payloads, tokens, active, inactive, and locked users, as well as user details.
Now, let's take a look at the Defender user self-service portal. Here we're logging in as a standard user that does not have administrator rights. The user is only presented options for registering the hardware token or requesting software token. In this example, we'll go ahead and request a software token. The user is presented with the available software tokens configured for their user ID. Here we can see that we can generate soft tokens for various devices, an Authy token, email token, Google Authenticator, GrIDsure, SMS, or a VIP credential.
After I've selected the token that I'd like to generate, I now have a confirmation screen that shows details about the token that has now been assigned to me. I have a link where I can download the soft token for Android application, the activation code that can be copied and pasted it into the application, as well as to be able to automatically insert the activation code into the software token. We can email this information to a user's email address, and we provide a QR code that a user can use a smartphone or tablet to take a picture of the QR code and automatically download the soft token application and implement the activation code.
That concludes this Defender solution video. Thank you for watching.
 06:02
06:02
